The Transition Wave Drill: Mastering the Moment the Ball Changes Hands
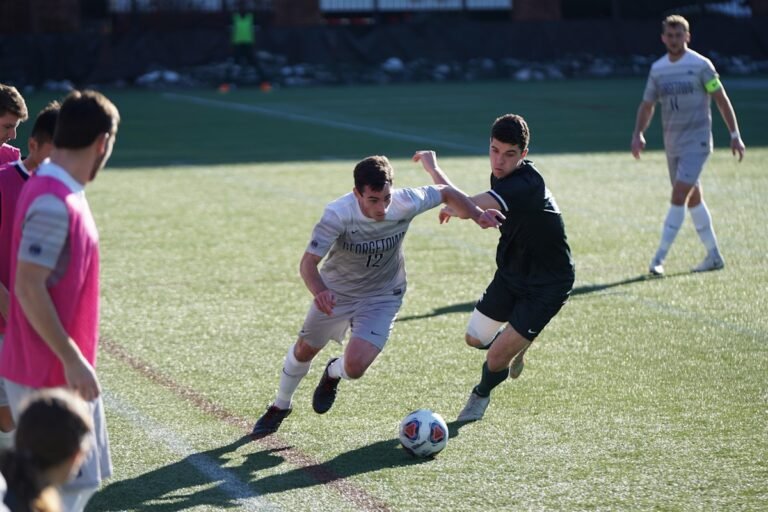
In 7-a-side futsal, the most dangerous moment in the game is the transition — the split second when possession changes from one team to the other. The team that wins the ball has a 2-3 second window where the opposition is disorganised, players are out of position, and the pitch is open for a fast break. The team that loses the ball has that same 2-3 second window to recover their shape and prevent a counter-attack.
The best teams in any form of football — from Premier League sides to Nairobi 7-a-side leagues — are the ones who win this moment consistently. The Transition Wave Drill trains both sides of this critical phase: the attacking break and the defensive recovery.
This drill is designed for teams training at PAKTB Grace Sports Centre in Thindigua or any 7-a-side pitch. It requires 10-14 players, a full pitch, and 20-25 minutes of focused practice.
What This Drill Teaches
- Attacking transition: Winning the ball and breaking forward quickly, with direct passes and overlapping runs
- Defensive transition: Losing the ball and recovering behind it immediately — sprinting to get goalside
- Decision-making under fatigue: The drill is physically demanding, forcing players to make good decisions when tired — just like the 55th minute of a real match
- Communication: Players must shout “TURN!” when possession changes, triggering the transition
Setup
Equipment
- Full 7-a-side pitch (50m x 30m)
- 2 full-size goals with goalkeepers
- 12 cones to mark the three zones
- Bibs for two teams (e.g., red and blue)
- 6-8 balls placed behind each goal (for quick restarts)
Pitch Division
Divide the pitch into three equal zones using cones placed along the sidelines:
- Zone A (Defensive third): From one goal line to approximately 17m out
- Zone B (Middle third): The central 16m strip
- Zone C (Attacking third): From approximately 33m to the opposite goal line
Player Positions
Split into two teams of 5-6 outfield players plus goalkeepers. Each team starts in their defensive third (Zone A for Team Red, Zone C for Team Blue).
How the Drill Works
Wave 1: The Build-Up (30 seconds)
- The coach plays a ball to Team Red’s goalkeeper.
- The GK distributes to Team Red’s defenders, who build out from the back.
- Team Red must pass the ball through Zone A (at least 3 passes in this zone) before they can advance into Zone B.
- Team Blue sends 2 players to press in Zone A. The remaining Blue players wait in Zone B and Zone C.
- Once Team Red successfully enters Zone B, all Blue players activate and defend.
Wave 2: The Transition Moment
This is where the drill gets real. One of two things happens:
Scenario A — Team Red scores or the ball goes dead: The coach immediately plays a new ball to Team Blue’s goalkeeper, and the roles reverse. Team Blue now builds from the back while Team Red transitions to defence. Both teams must sprint to their new positions.
Scenario B — Team Blue wins the ball: Team Blue counter-attacks immediately towards Team Red’s goal. Team Red must recover — every Red player sprints goalside (getting between the ball and their own goal). No walking. No jogging. Sprint.
Wave 3: Continuous Play
The drill continues in waves. Every time the ball goes dead (goal, out of play, save), the coach plays a new ball to the team that was defending, and the roles switch. This creates continuous transitions — exactly the pattern of a real match.
Run 8-10 waves without stopping. Rest 90 seconds. Repeat 3 times.
Coaching Points: Attacking Transition
The First Pass Forward
When your team wins the ball, the first pass should be forward whenever possible. Not sideways, not backwards — forward. In a 7-a-side match, a quick forward pass after winning the ball can bypass 2-3 defenders in one movement. Look for the “free player” — the teammate who is in space because the opposition has not recovered yet.
Sprint Into Space
The moment possession changes, the two nearest attackers should explode into space. Do not wait for the ball to arrive — start your run immediately. In 7-a-side, a 3-second head start is the difference between a goal and a blocked shot.
Width and Depth
On the counter-attack, spread wide and stretch the pitch. One player goes wide left, one goes wide right, one drives through the centre. This forces the recovering defenders to make difficult decisions about who to mark.
Finish Quickly
The counter-attack window closes fast. If you have a shooting opportunity, take it. Do not over-pass looking for the perfect chance. In the transition, a good shot now is better than a perfect shot in 5 seconds — because in 5 seconds, the defence has recovered.
Coaching Points: Defensive Transition
Sprint Goalside Immediately
The number one rule of defensive transition: get goalside. This means getting your body between the ball and your own goal. It does not matter where you are on the pitch — when possession changes, your first movement is backwards towards your own goal. Then you can reassess.
Delay the Attack
The nearest player to the ball when possession changes has one job: slow the counter-attack down. They do not need to win the ball — they just need to stop the attacker from driving forward unopposed. Get close, stay on your feet (do not dive in), and buy time for teammates to recover.
Communicate
The player who loses the ball should shout “TURN!” to alert the entire team that possession has changed. This verbal trigger starts the recovery run for everyone. In the chaos of transition, communication is the difference between an organised recovery and a disorganised scramble.
Recover Shape Before Winning the Ball
Do not chase the ball. Chase your position. If you are a defender, get into the defensive line. If you are a midfielder, get into the midfield line. Once the team is in shape — THEN press to win the ball. Chasing the ball individually leaves gaps that good attackers exploit.
Progressions to Increase Difficulty
Progression 1: Time Limit on Attack
The attacking team has 8 seconds from entering Zone B to score. This forces faster decision-making and more direct play. Count out loud: “Eight… seven… six…” — the pressure of a countdown pushes players to play forward.
Progression 2: Numerical Overload
Allow 3 Blue players (instead of 2) to press in Zone A when Red is building out. This makes the build-up harder and simulates matches against high-pressing opponents.
Progression 3: Free Transition
Remove the zone restrictions entirely. Both teams play freely across the full pitch. The coach still controls the waves by playing new balls in, but the transitions happen organically based on turnovers in open play. This is the closest simulation to a real match.
Physical Demands and Recovery
This drill is intense. The constant transitions — sprinting forward to attack, then immediately sprinting back to defend — replicate the physical demands of a competitive 7-a-side match. Players will cover significant distance in a short time.
Tips for managing the physical load:
- Hydration breaks: Allow water at the 90-second rest between sets. Keep water bottles at the sideline.
- Rotate players: If you have more than 12 outfield players, rotate 2-3 players per set. Fresh legs maintain the intensity.
- Monitor fatigue: When technique breaks down (sloppy passes, late decisions, players walking), the set is over. End on quality, not on exhaustion.
- Do not run this drill first. Place it in the middle or second half of the session, after a proper warm-up and technical phase. Cold muscles + high-intensity transitions = injury risk.
Why This Drill Transforms Your Team
Most casual 7-a-side teams in Nairobi lose goals in transition because they simply do not train for it. They practice passing, shooting, and dribbling — but they never practice the moment when the ball changes hands. That 2-3 second window is where matches are won and lost.
Run this drill once a week for a month and you will see a measurable difference in your team’s performance. Fewer goals conceded on the counter. More goals scored from turnovers. And a collective understanding of when to attack and when to recover that makes your team look organised, not chaotic.
The pitch at PAKTB Grace Sports Centre on Kiambu Road in Thindigua is the perfect surface for this kind of high-intensity training — consistent bounce, reliable footing, and floodlights for evening sessions when the day’s heat has faded.
Ready to sharpen your team’s transition game? Book a pitch at PAKTB Grace Sports Centre and start training the moment that matters most.